Triển khai với ArgoCD
Triển khai Workload với ArgoCD
Định nghĩa workload repo
ArgoCD Bootstrapping bắt đầu bằng việc xác định các biến với thông tin repo như URL của repo chứa workload và đường dẫn trong ứng dụng của các ứng dụng. Chúng ta sẽ sử dụng phiên bản nhỏ hơn của ứng dụng. Ví dụ full-scale của ứng dụng có chứa workload cho team-burnham:
const repoUrl = 'https://github.com/aws-samples/eks-blueprints-workloads.git'

const bootstrapRepo : blueprints.ApplicationRepository = {
    repoUrl,
    targetRevision: 'workshop',
}
Các bạn xem thêm EKS Blueprints Workloads
Định nghĩa ArgoCD add-on
Sau đó, các biến có thể được chuyển như một tham số trong các định nghĩa ArgoCD add-on cho stage của chúng ta. Theo tùy chọn, bạn có thể đặt secret cho quản trị viên Argo.
const prodBootstrapArgo = new blueprints.ArgoCDAddOn({
    bootstrapRepo: {
        ...bootstrapRepo,
        path: 'envs/dev'
    },
});
Bạn có thể đặt các đường dẫn khác nhau từ repo dựa trên môi trường mà bạn đang làm việc. Vì đường dẫn của chúng ta có triển khai dev, test và prod, nên chúng ta có thể đặt đường dẫn đến ’envs / dev’, ’envs / test’ và ’env / prod’, đồng thời đặt các biến thành các tên riêng biệt.
Sau đó, chúng ta có thể chuyển thông tin này đến đường dẫn bằng cách sử dụng phương pháp addOns như một phần của thuộc tính stackBuilder thúc đẩy kế hoạch chi tiết của blueprints.
blueprints.CodePipelineStack.builder()
  .name("pipeline-name")
  .owner("owner-name")
  .repository({
      repoUrl: 'repo-name',
      credentialsSecretName: 'github-token',
      targetRevision: 'main'
  })
  .wave({
      id: 'envs',
      stages: [
          { id: "dev", stackBuilder: blueprint.clone('ap-southeast-1').addOns(devBootstrapArgo)}
      ]
  })
  .build(app, 'pipeline-stack');
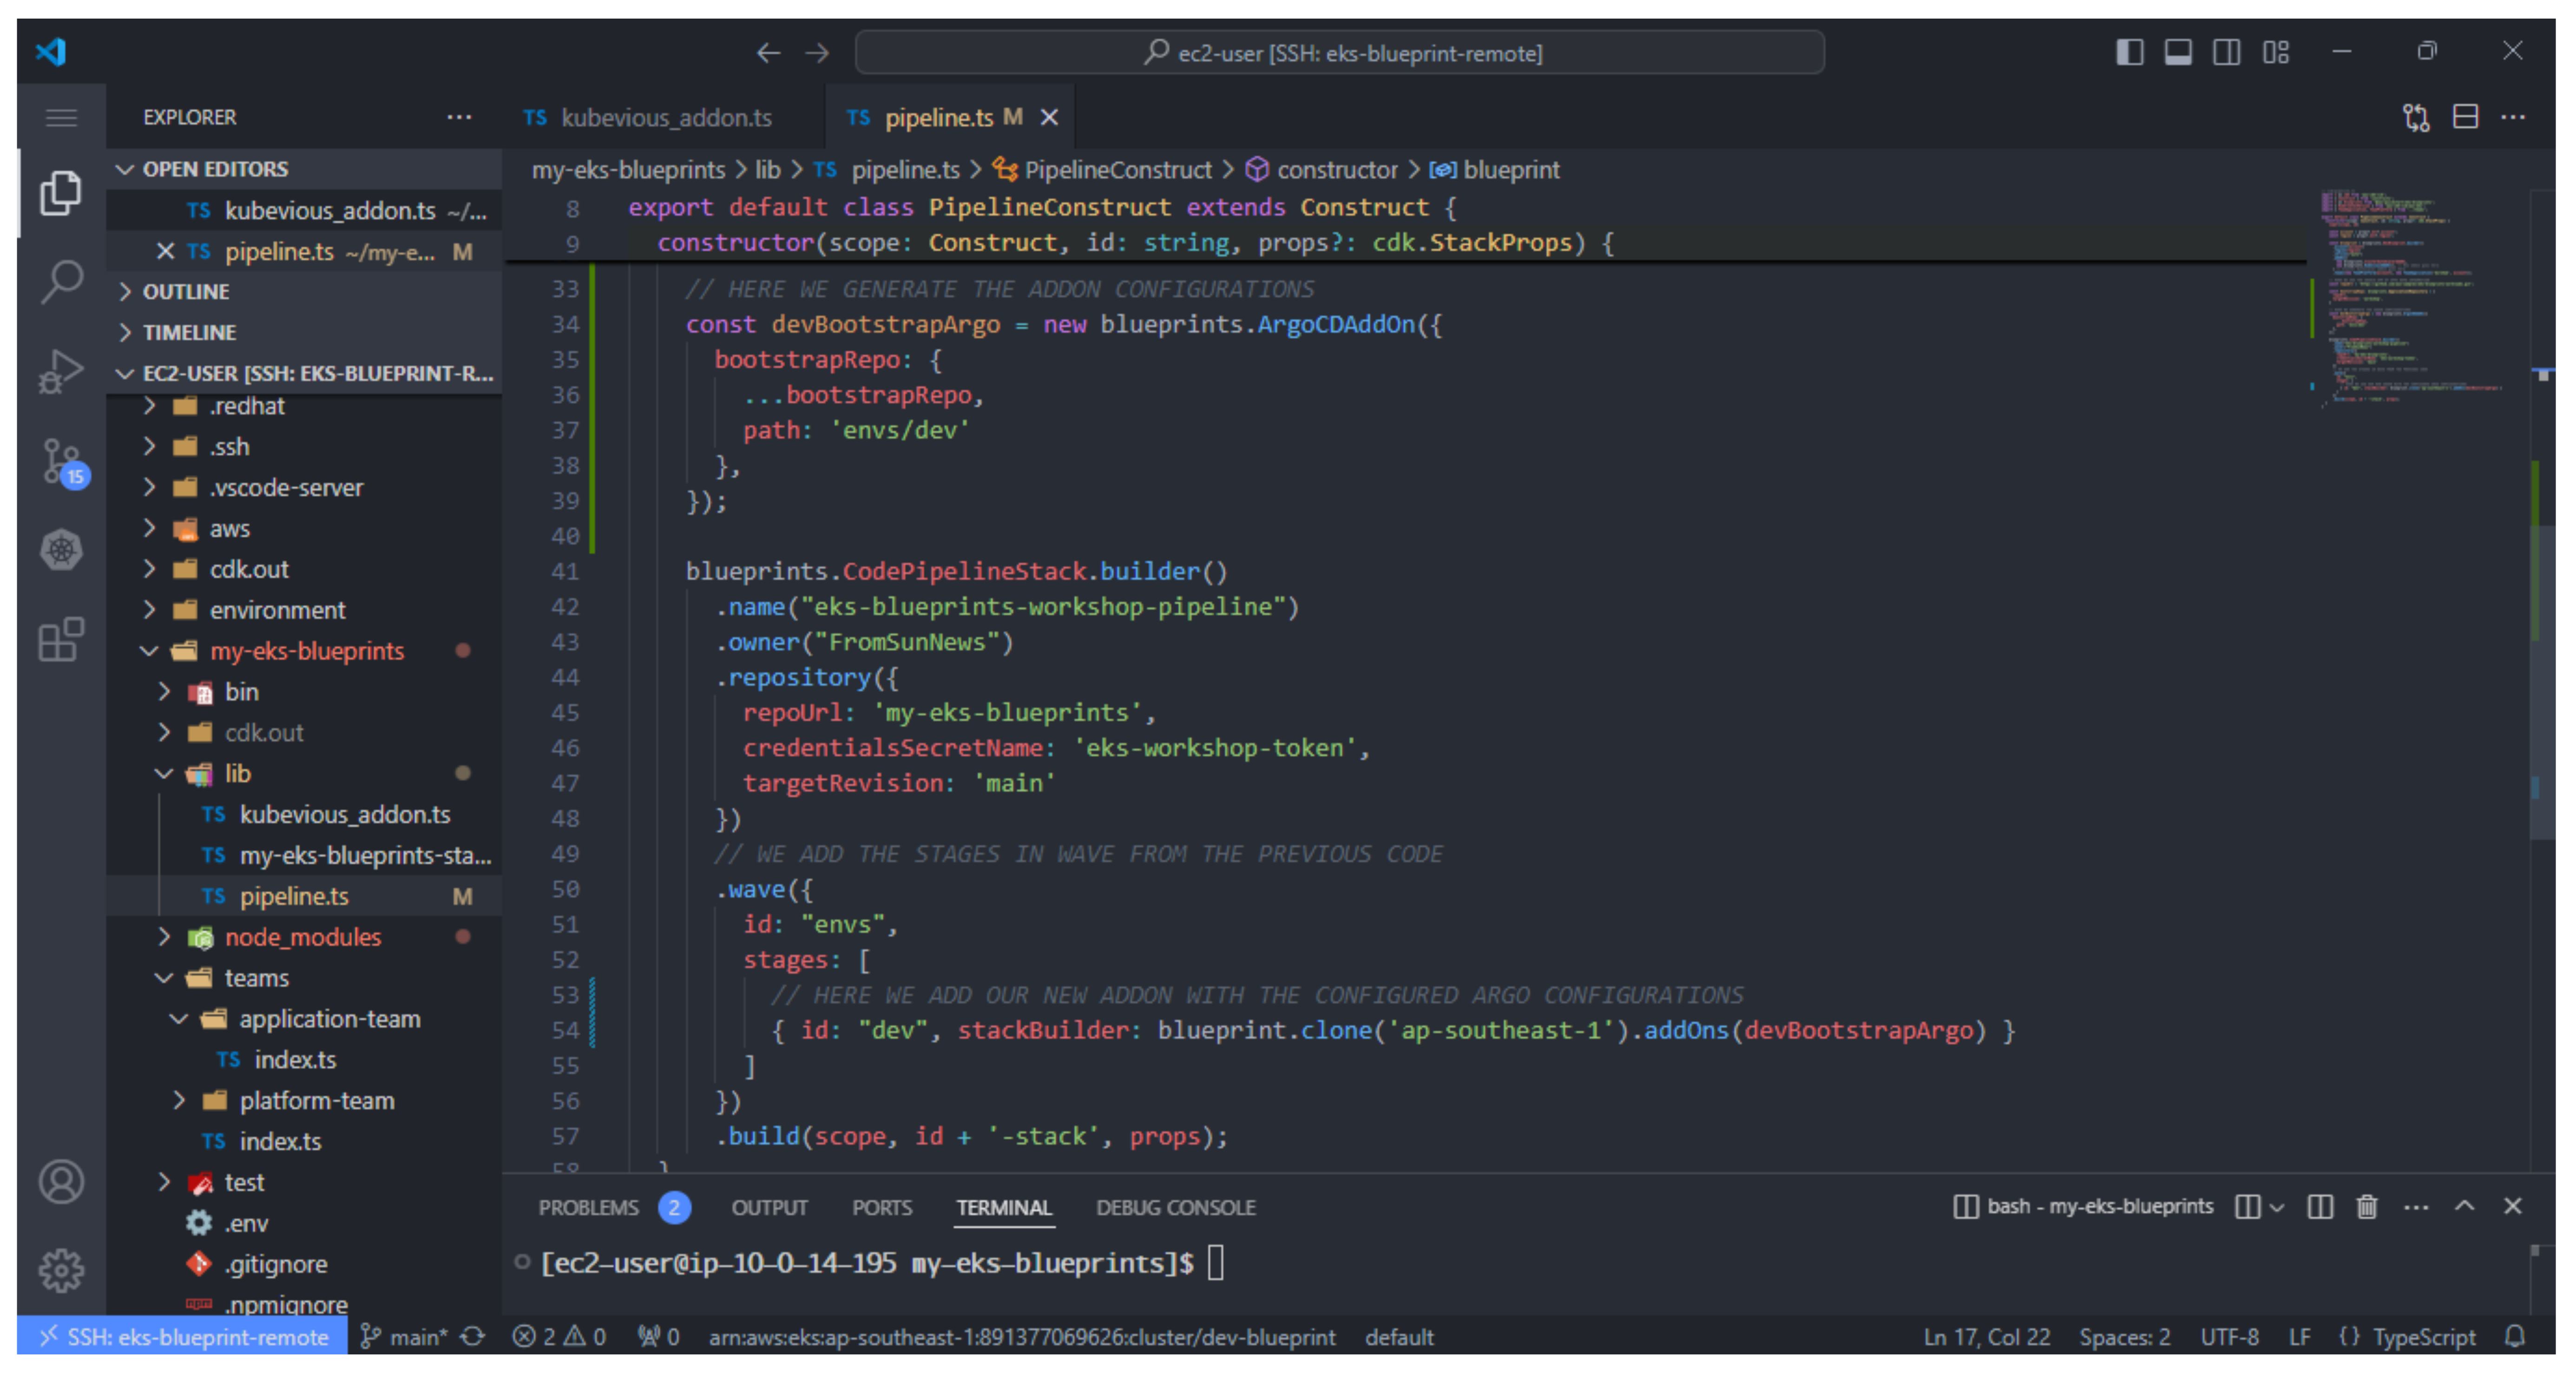
- Thực hiện thay đổi file lib/pipeline-stack.ts
// lib/pipeline.ts
import * as cdk from 'aws-cdk-lib';
import { Construct } from 'constructs';
import * as blueprints from '@aws-quickstart/eks-blueprints';
import { KubernetesVersion } from 'aws-cdk-lib/aws-eks';
import { TeamApplication, TeamPlatform } from '../teams';

export default class PipelineConstruct extends Construct {
  constructor(scope: Construct, id: string, props?: cdk.StackProps) {
    super(scope, id)

    const account = props?.env?.account!;
    const region = props?.env?.region!;

    const blueprint = blueprints.EksBlueprint.builder()
      .account(account)
      .region(region)
      .version("auto")
      .addOns(
        new blueprints.ClusterAutoScalerAddOn,
        new blueprints.KubeviousAddOn(),
      )
      .teams(new TeamPlatform(account), new TeamApplication('burnham', account));

    // HERE WE ADD THE ARGOCD APP OF APPS REPO INFORMATION
    const repoUrl = 'https://github.com/aws-samples/eks-blueprints-workloads.git';

    const bootstrapRepo: blueprints.ApplicationRepository = {
      repoUrl,
      targetRevision: 'workshop',
    }

    // HERE WE GENERATE THE ADDON CONFIGURATIONS
    const devBootstrapArgo = new blueprints.ArgoCDAddOn({
      bootstrapRepo: {
        ...bootstrapRepo,
        path: 'envs/dev'
      },
    });

    blueprints.CodePipelineStack.builder()
      .name("eks-blueprints-workshop-pipeline")
      .owner("your-github-username")
      .repository({
          repoUrl: 'your-repo-name',
          credentialsSecretName: 'github-token',
          targetRevision: 'main'
      })
      // WE ADD THE STAGES IN WAVE FROM THE PREVIOUS CODE
      .wave({
        id: "envs",
        stages: [
          // HERE WE ADD OUR NEW ADDON WITH THE CONFIGURED ARGO CONFIGURATIONS
          { id: "dev", stackBuilder: blueprint.clone('ap-southeast-1').addOns(devBootstrapArgo) }
        ]
      })
      .build(scope, id + '-stack', props);
  }
}
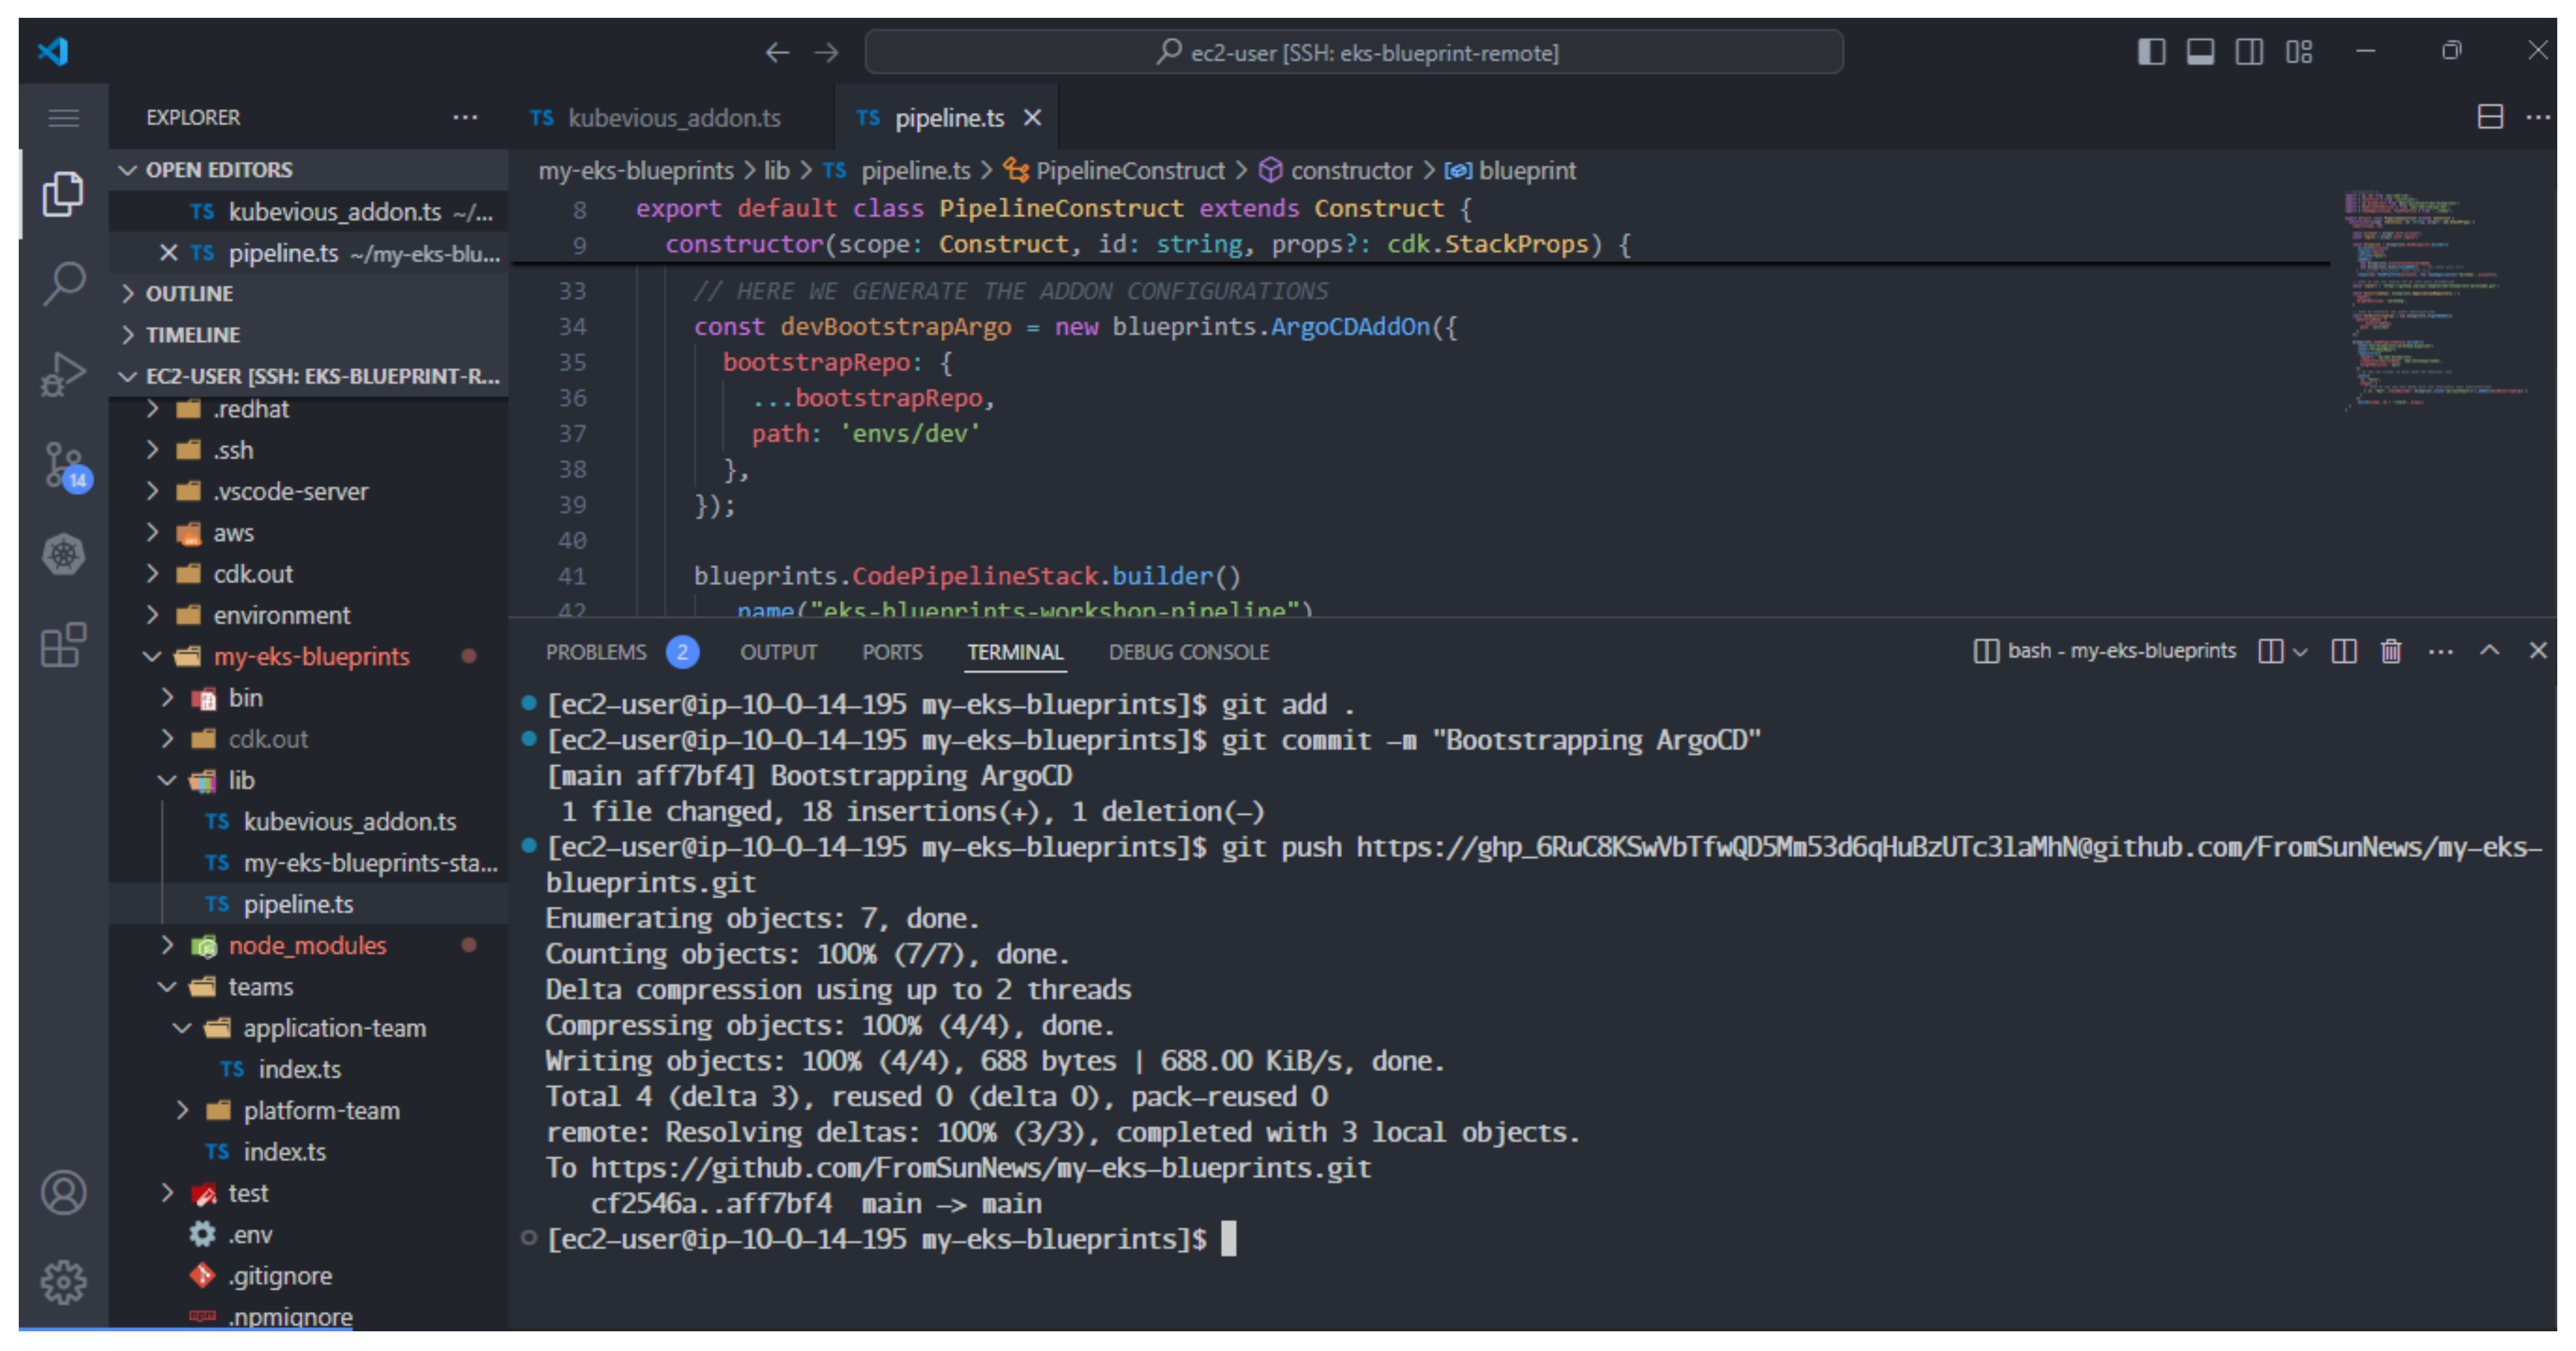
- Thực hiện push thay đổi lên Github repository
git add .
git commit -m "Bootstrapping ArgoCD"
git push https://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@github.com/FromSunNews/my-eks-blueprints.git
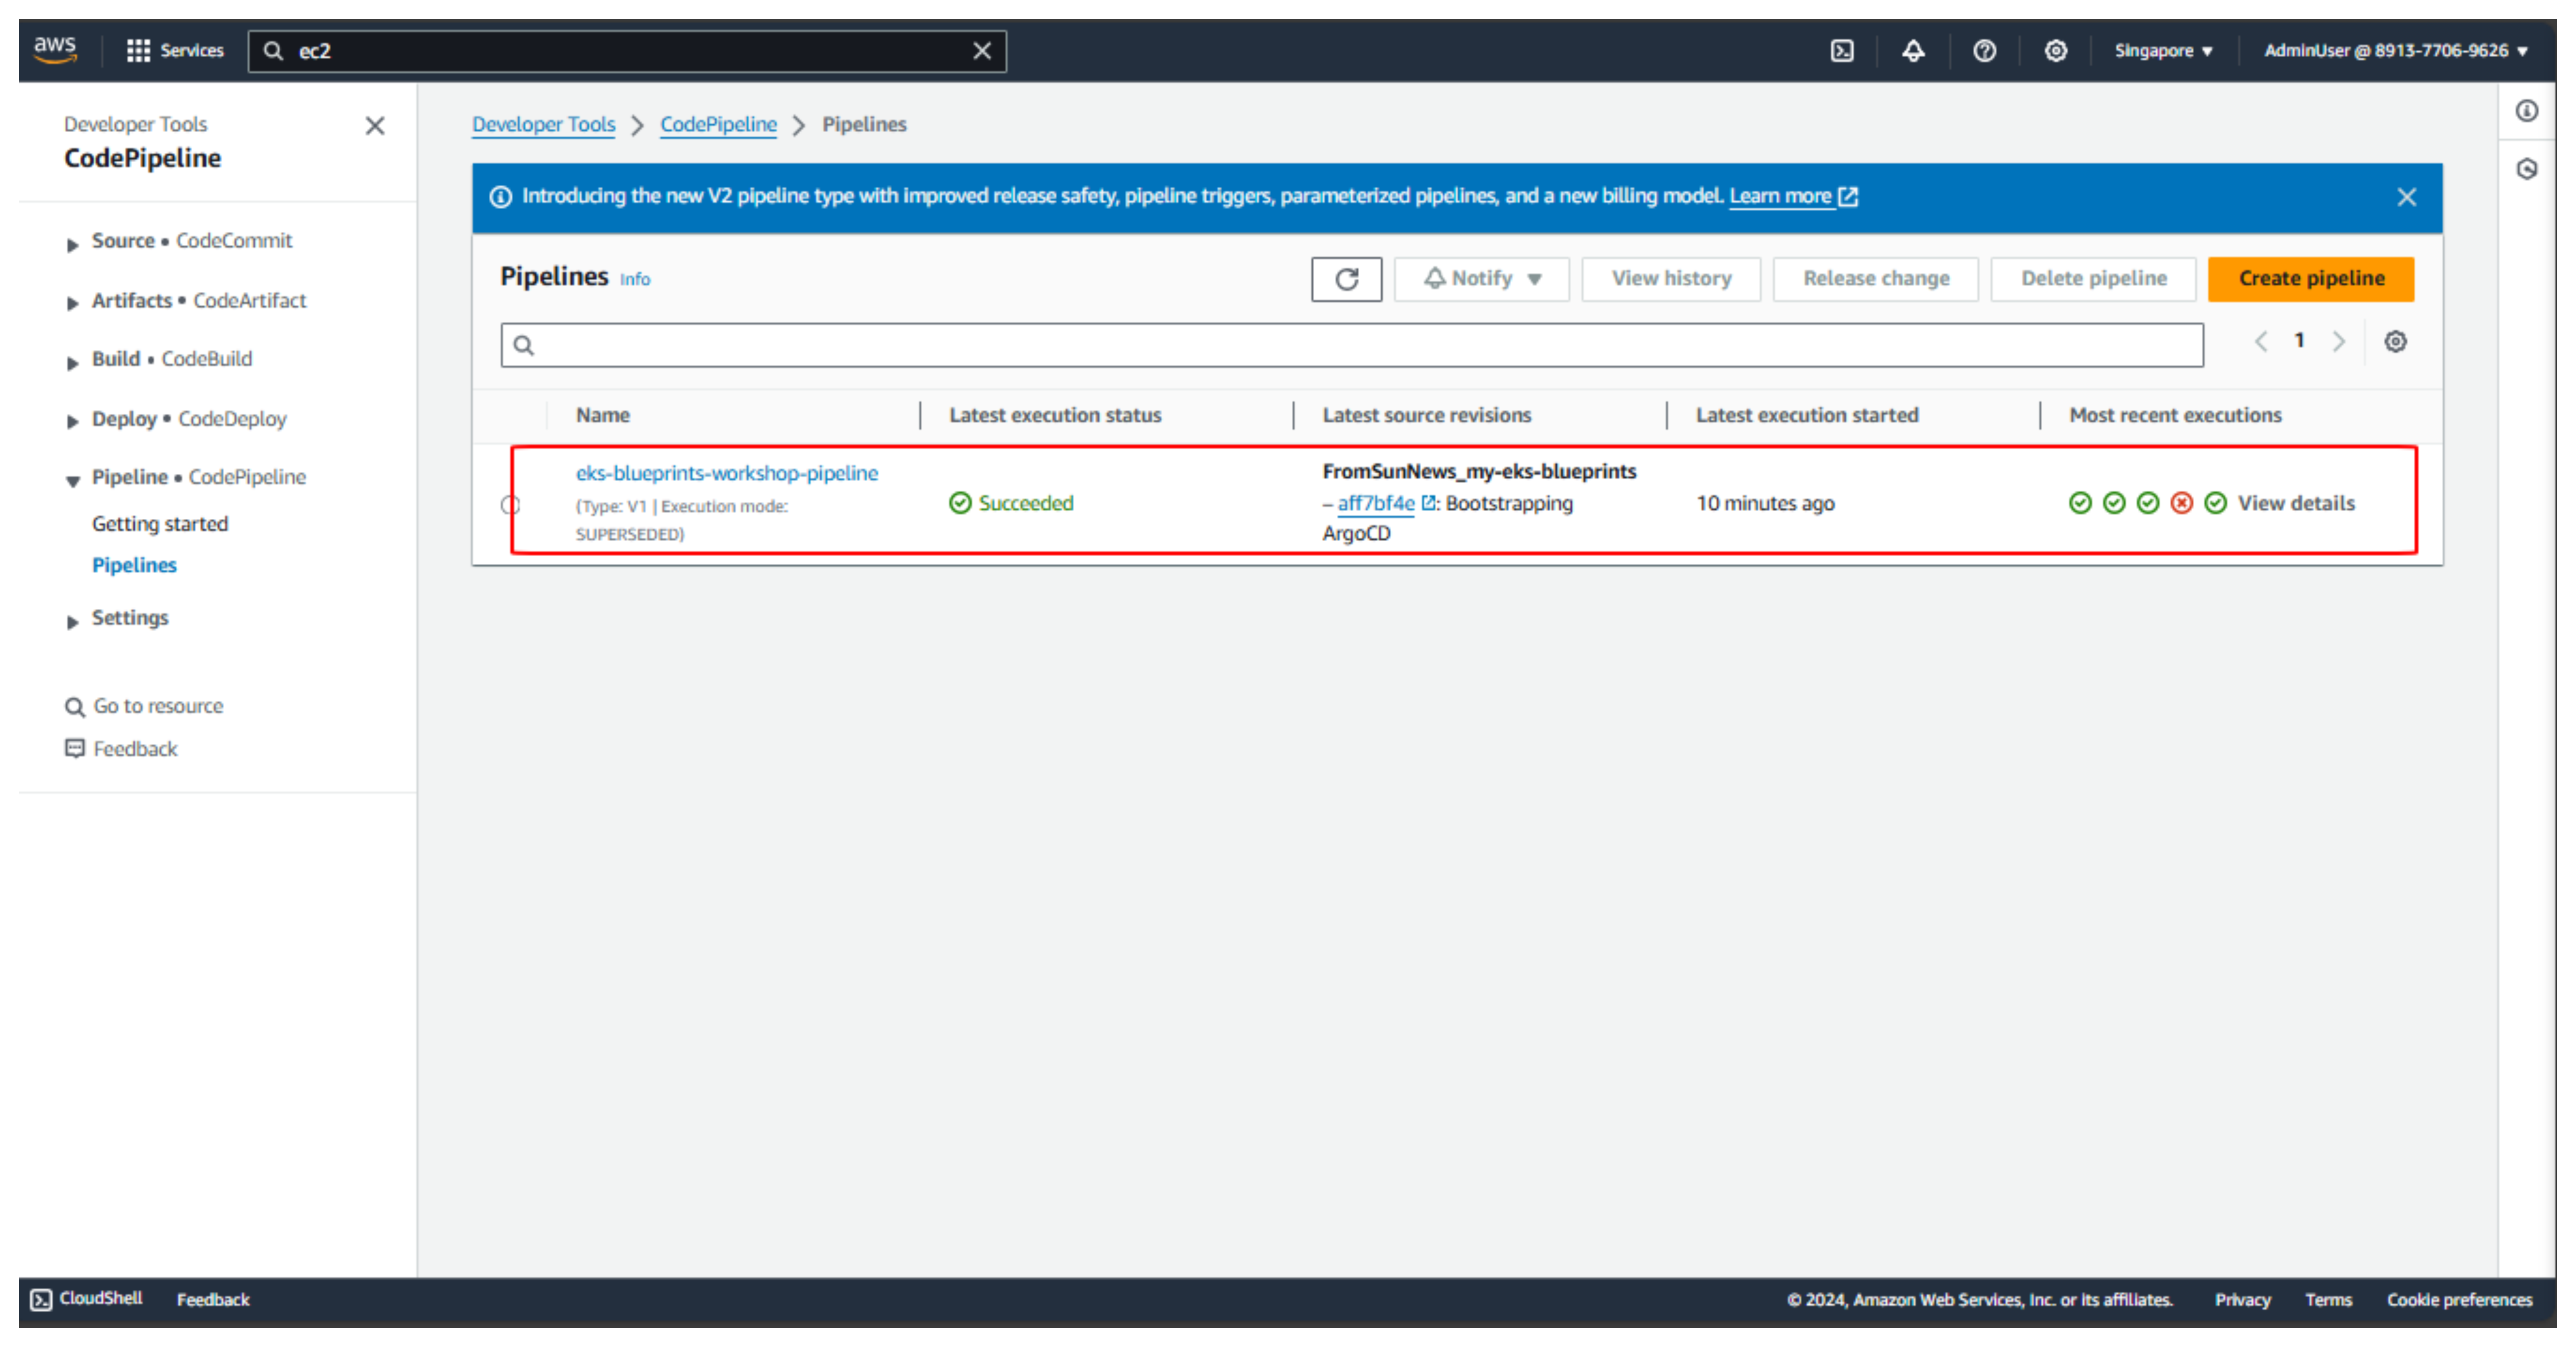
- Đợi 15 phút sau sẽ hoàn thành
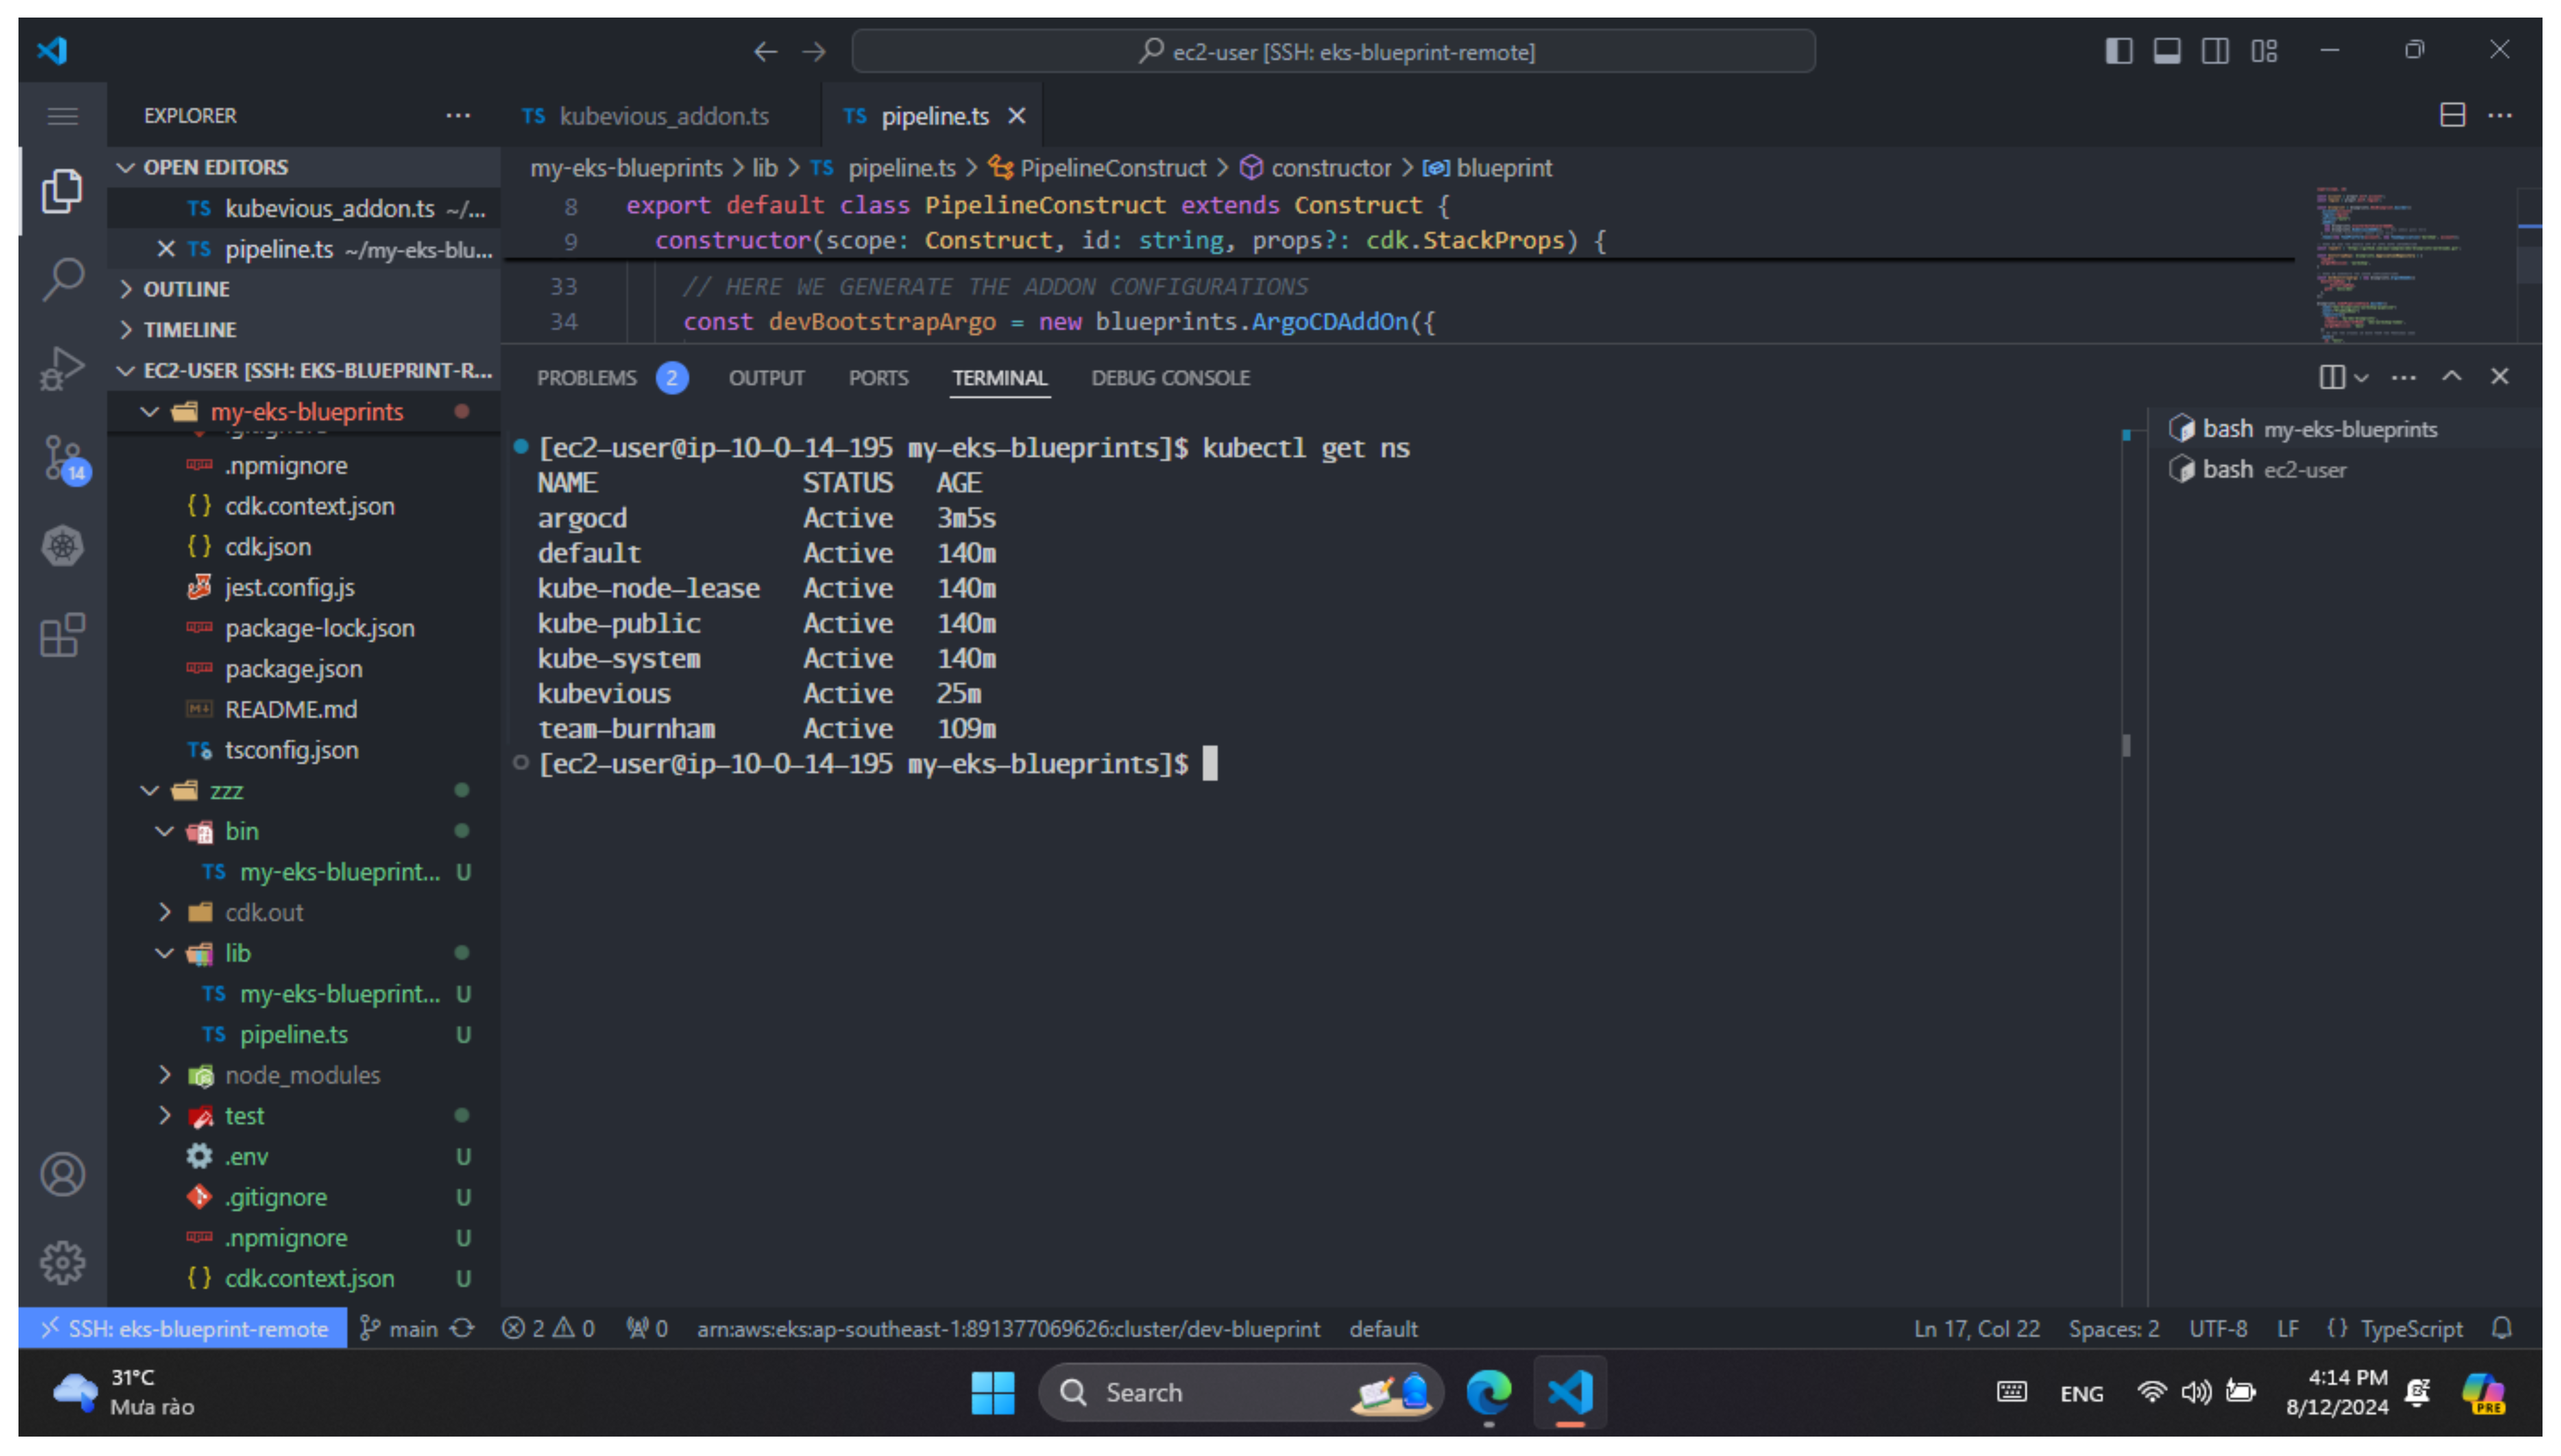
- Thực hiện kiểm tra argocd namespace bằng lệnh.
kubectl get ns